With CopyTrans - the iPod to computer, backup software you will be able to transfer all of your tracks from iPod, iPad or iPhone to PC.
Have you ever accidentally deleted songs/videos off your PC? What could you do if you want to transfer tracks from iPhone back to computer, but they are only to be found on your iPod, iPhone, or iPad?
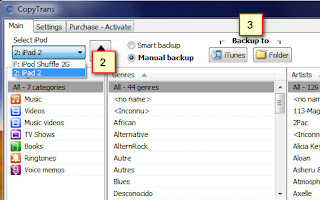
When using CopyTrans in "Manual backup" mode, you can backup iPhone tracks, artworks and playlists along with track info such as play-counts, ratings etc. to a folder on your PC. You have full control over which iPod tracks you want to transfer. You can even customize how the iPad, iPod and iPhone tracks are transferred by selecting what gets backed up and in what folders.

In order to start using CopyTrans:
- Start the program
- Connect your iPod/iPhone/iPad
- Switch to "Manual backup"
To explore the contents of your iPod/iPhone/iPad with CopyTrans:
- Use the Categories, Genres, Artists and Albums menus to easily browse your iPod.
- You can search for specific tracks by using the search box.
- Click on an iPod playlist to display its tracks.
- Sort tracks in the main list view by clicking on any column name.
To select which tracks you want to transfer from iPod/iPad or iPhone to computer:
- Select an iPhone track or playlist for backup, by ticking its checkbox.
Note: If you mark a playlist as checked for backup, this will automatically select all playlist tracks. You can double click a track to mark it for backup. To select all visible tracks, right click and select "Check All" (you can also use the "Ctrl+A" - keyboard shortcut).
When you are ready, you can backup your iPod/iPad/iPhone to a folder on your computer.
Once you have selected your choice of iPhone tracks to transfer, click the "Backup to Folder" button. You will then be asked to select the folder on your PC or on an external hard drive where the iPod/iPhone tracks will be backed up.
Customize your iPhone backup settings
A new window appears and lets you choose to where you want to backup your iPod/iPad/iPhone tracks:
- Destination folder: This is the folder on your PC where the transferred iPod tracks will be saved
- File and folder naming preview: This lets you customize the way you will transfer iPod tracks e.g their name and folder hierarchy.
Customize file and folder naming
- Folder name options: This lets you decide how folders and sub-folders should be generated.
Note: If you want all your iPhone track files to be transferred into a single folder on your PC (no subfolders), set all 3 drop down menus to blank. - File name options: Here, you can customize how each transferred iPhone track file should be named.
Starting the iPod backup
- When you are done customizing your transfer, click OK and then click "Start backup"
- The "Backup in progress" window will appear and CopyTrans will start backing up your iPod/iPhone/iPad files. The time of transfer will depend on how many iPad/iPhone tracks are selected for backup
- Once all iPod Touch tracks have been copied, an iPhone/iPod backup summary window will appear.
Everything is now in your folder on your PC!
Selected tracks are now in the destination folder exactly the way you wanted them to.
In addition, you can automatically transfer music from ipod to iTunes.
Note: Due to iTunes limitations, when using the above mentioned iPhone import into iTunes option after a "Backup to Folder", some track information will not be imported back into iTunes (i.e. Date Added).


